
Labels and filters in Gmail offer a way to organize your inbox. Labels are folders within your inbox, and filter can automatically label, archive, delete, star, or accomplish tasks.
1.1 Creating Labels
1.2 Editing Labels
1.3 Removing Labels
1.4 Using Labels
2.1 Creating Filters
2.2 Removing or Editing Filters
Google Label Documentation
Google Filter Documentation
_______________________________________________________________________________________________________________
Labels
Use labels to groups emails
1.1 Creating Labels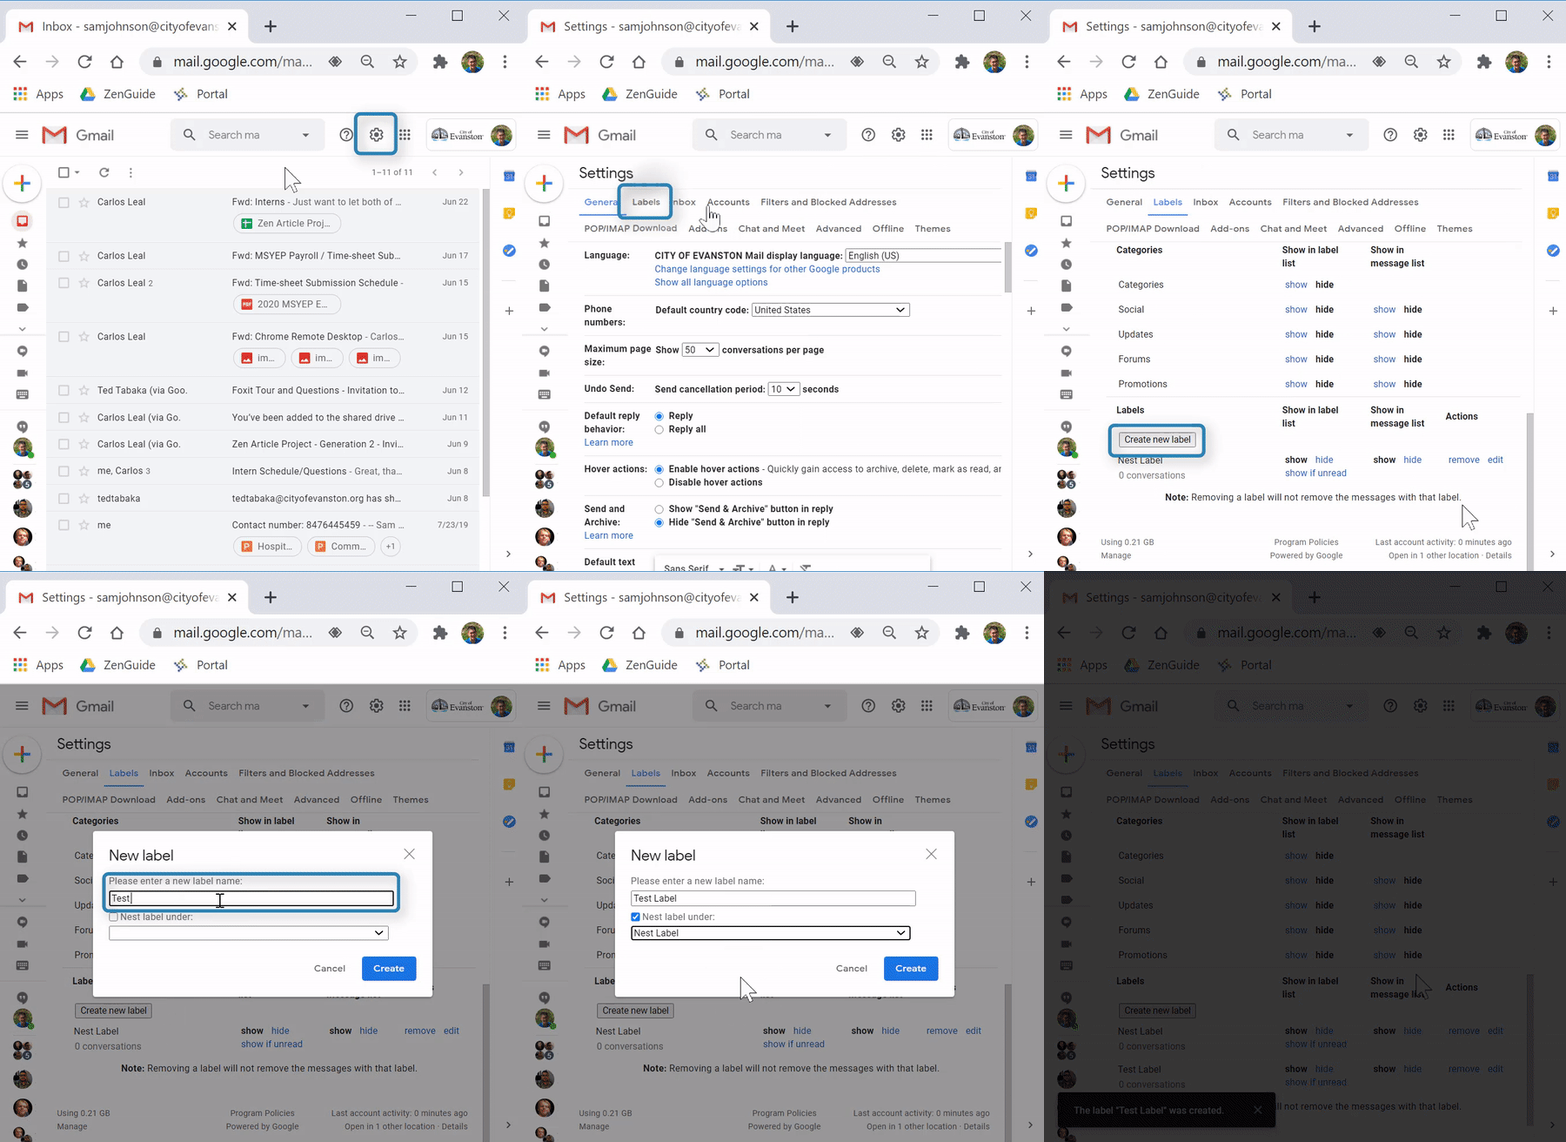
(Video Loading)
Steps
1. Open a web browser 


2. Open Gmail 
3. Select the "settings" icon  from the top right
4. Select "See all settings" 
5. Select the "Labels" tab 
6. Scroll down to the "Labels" section at the bottom 
7. Select "Create new label" 
8. Enter label name 
9. Optional: To "nest" the new label inside of another label, check the "Nest label under" box and choose a label from the dropdown to nest under

10. Select "Create" 
From this menu, you can edit label settings, rename, nest and remove labels.

_______________________________________________________________________________________________________________
1.2 Editing Labels
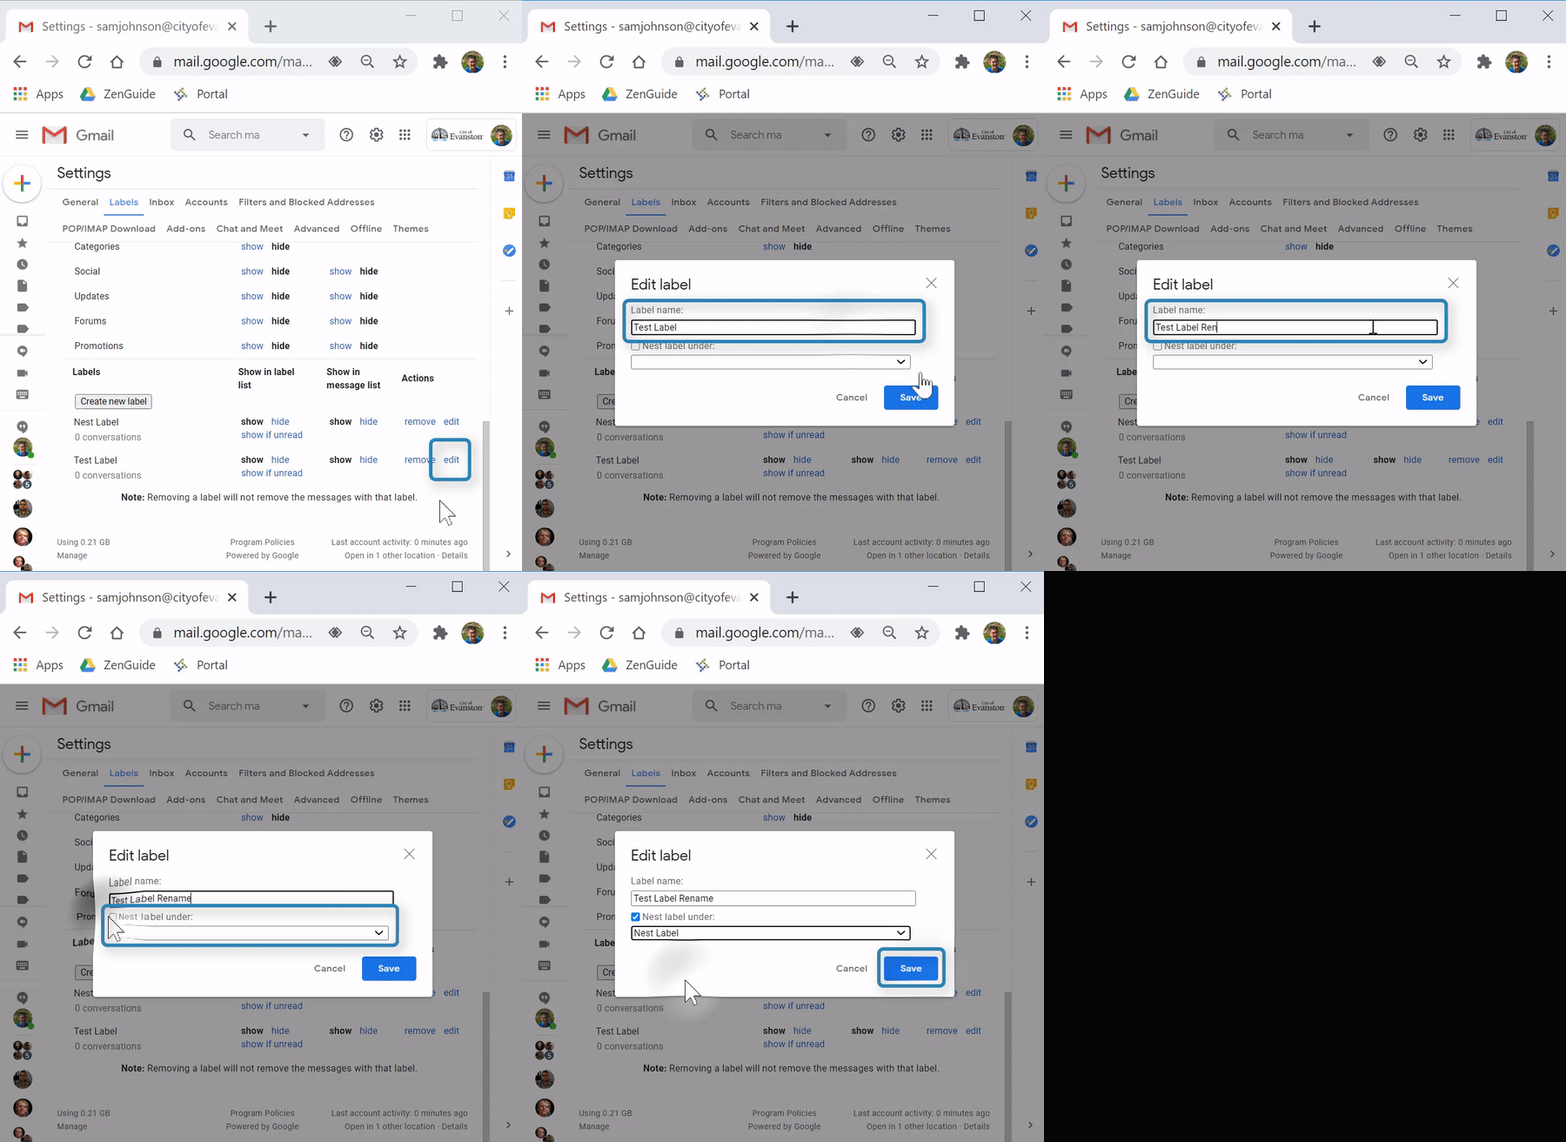
(Video Loading)
Steps
1. From the menu above, select "edit"  next to the label
2. Enter new name in "Label name" to rename 
3. Check or un-check "Nest label under" box to enable or disable, or choose from the dropdown to select or switch label to nest under

4. Select "Save" 
_______________________________________________________________________________________________________________
1.3 Removing Labels
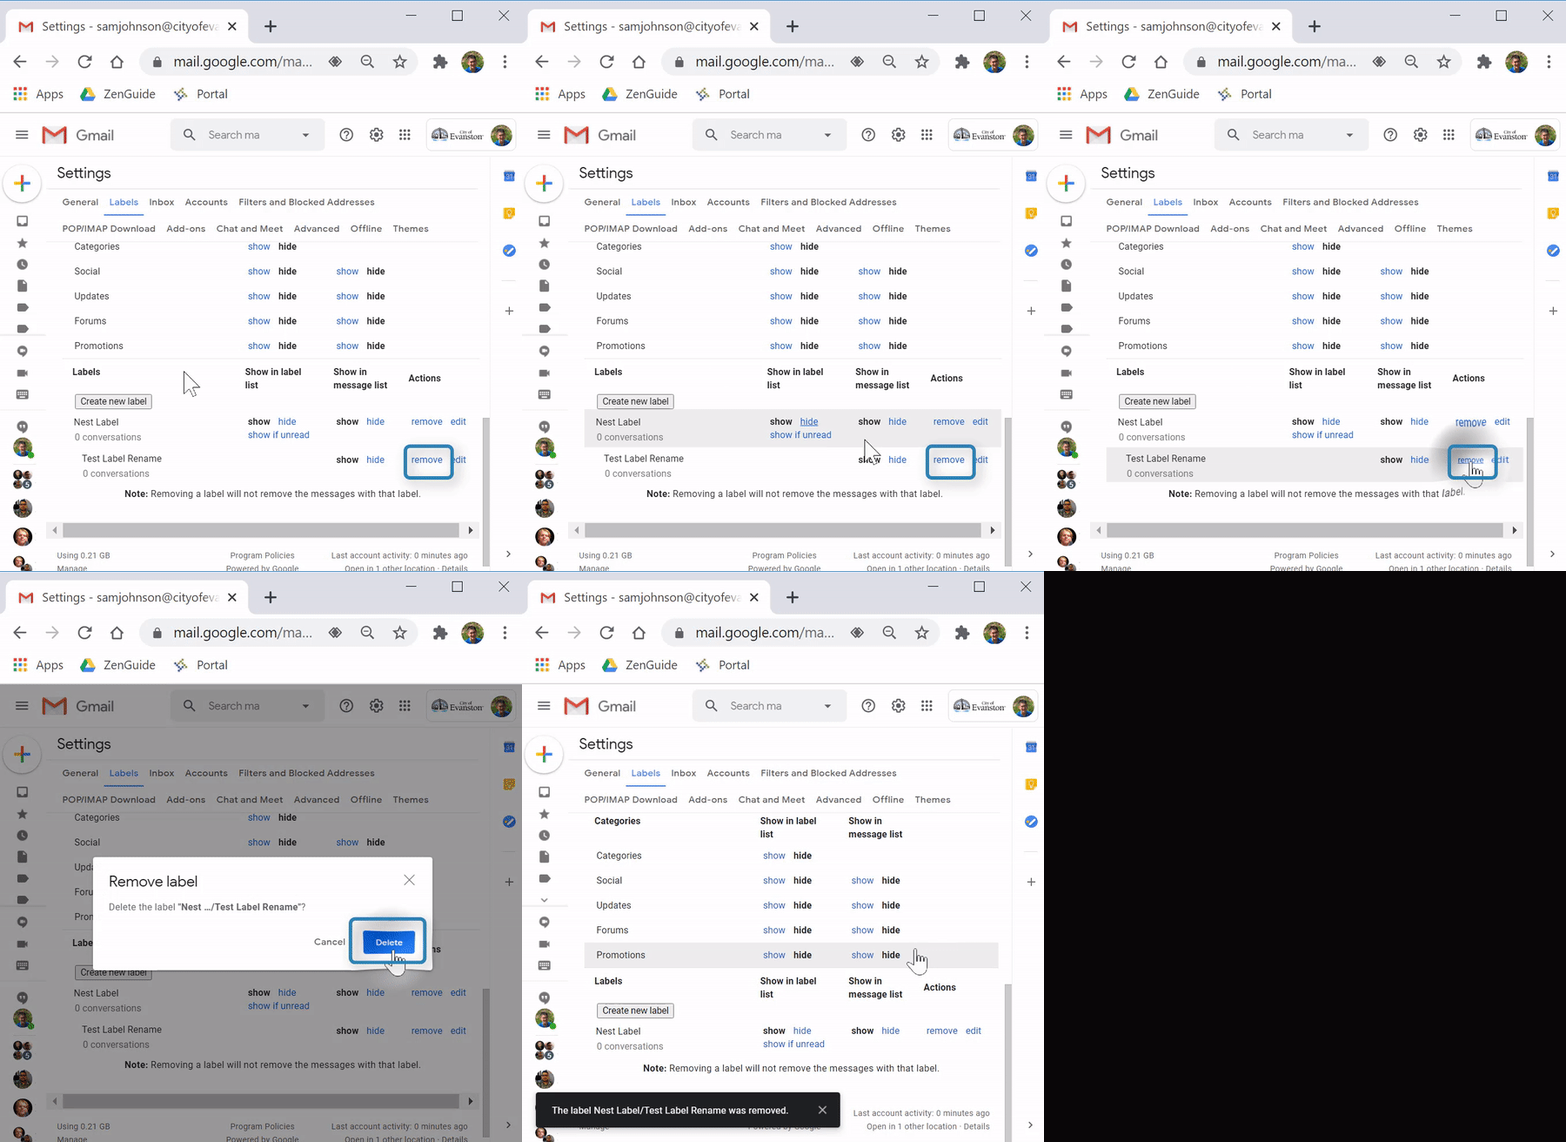
(Video Loading)
Steps
1. From the menu above, select "remove"  next to the label
2. Select "Delete" 
_______________________________________________________________________________________________________________
1.4 Using Labels
- To add a label to an email, open the email, select the "Label" icon
 , select labels
 , then select "Apply"
- To view all emails under a label, select the label
 from the Gmail toolbar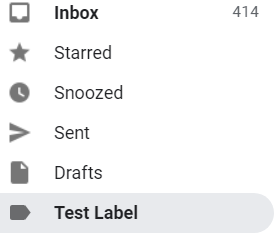
- To remove a label from an email, open the email and select the "x" next to the label

- To edit the label color, select the "menu" icon
 next to the label in the toolbar
  , select "Label color"
  and select a color
_____________________________________________________________________________________________
2 Filters
Use filters to automatically apply labels to certain emails
2.1 Creating Filters
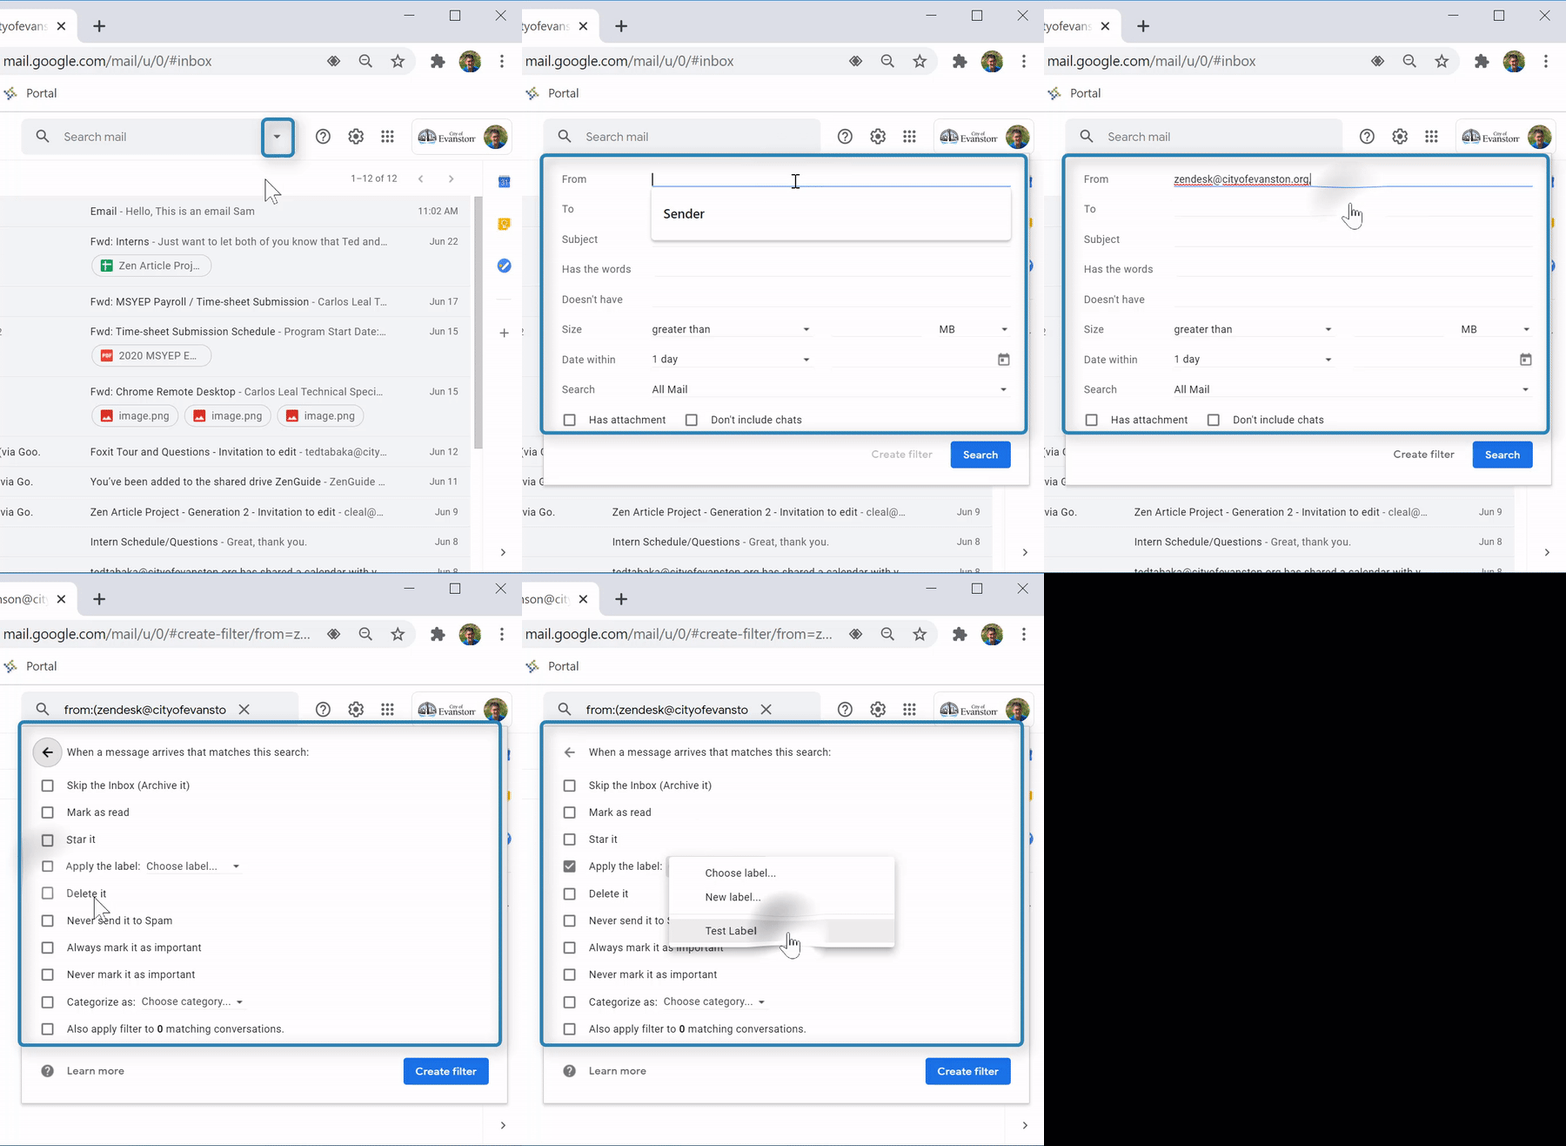
(Video Loading)
Steps
1. Open a web browser
2. Open Gmail
3. Select the dropdown arrow  at the right of the search bar

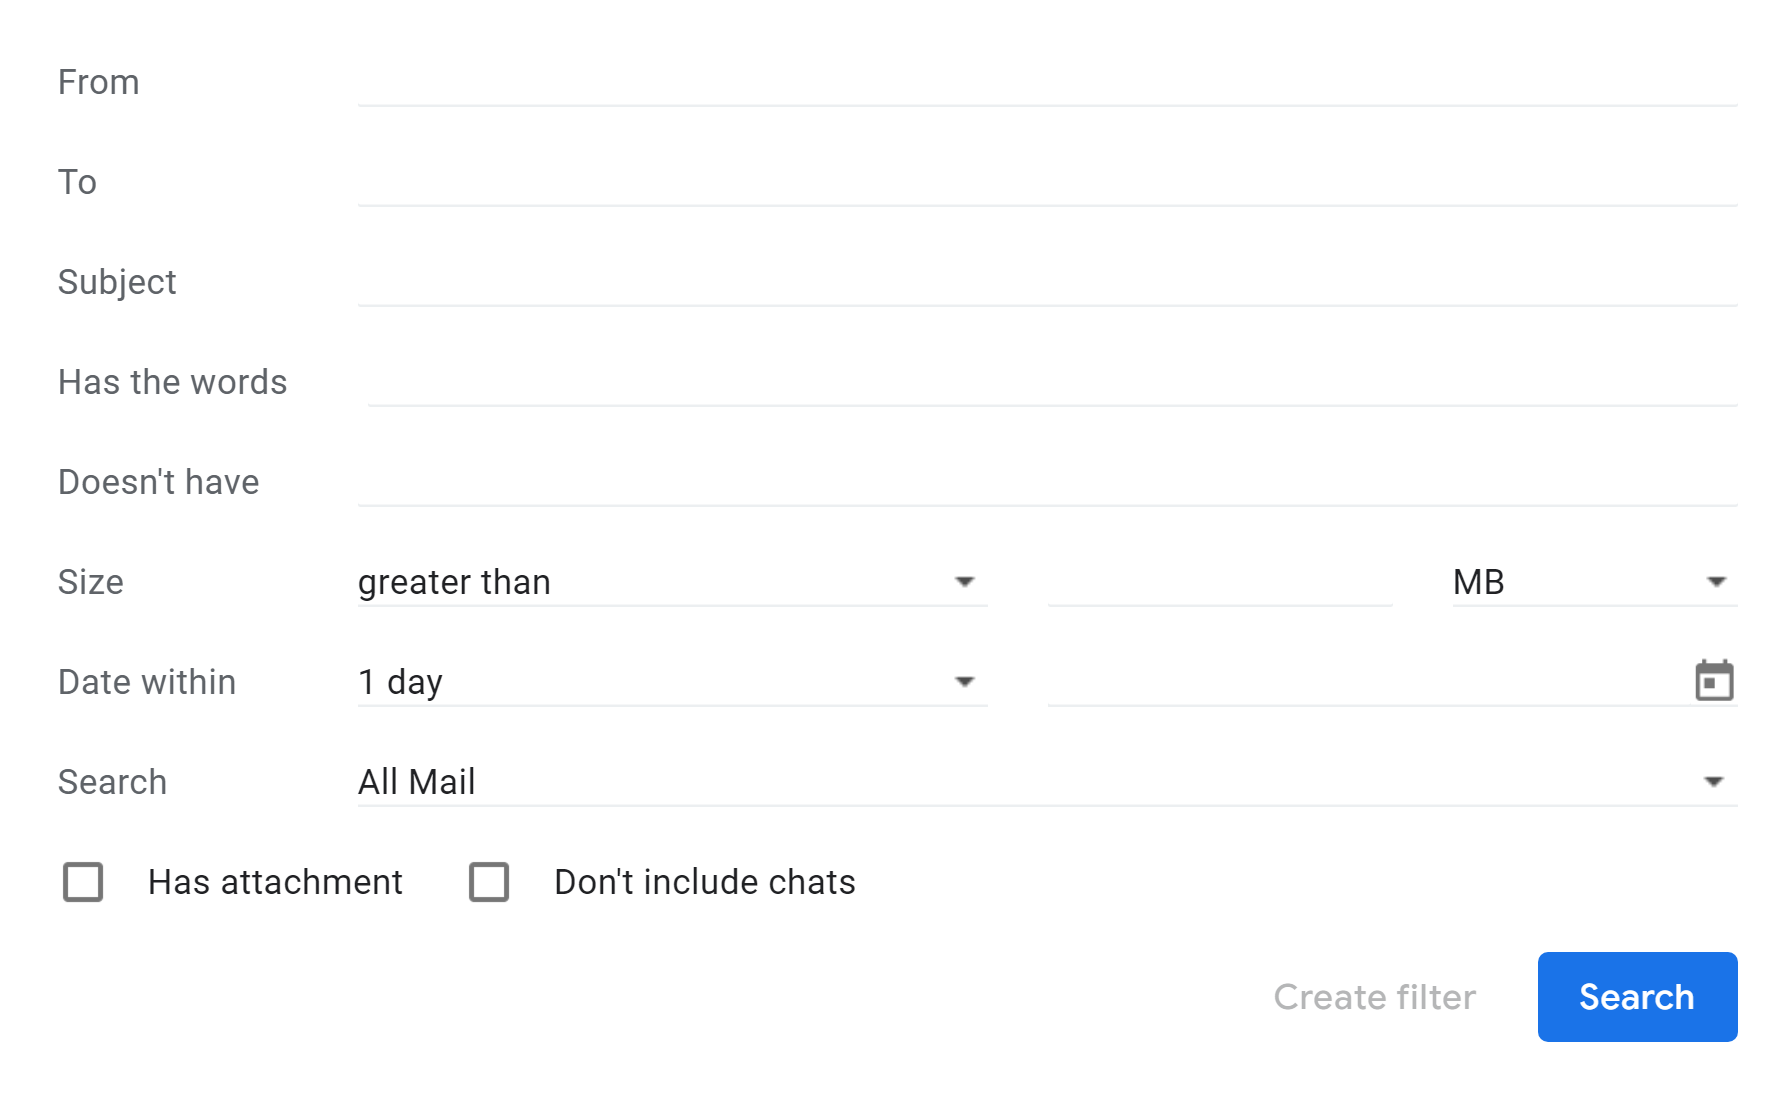
4. A menu will appear for filtering mail searches. Options include:
- From - Filter to mail from specific email addresses (Enter addresses)
- To - Filter to mail sent to specific email addresses (Enter addresses)
- Subject - Filter to mail with specific subject (Enter subject)
- Has the words - Filter to mail that includes specific words (Enter words)
- Doesn't have - Filter to mail without specific words (Enter words)
- Size - Filter mail by file size (Choose "greater than" or "less than" from dropdown, enter numeric size value, choose "MB, "KB" or "Bytes" from dropdown)
- Date within - Filters to mail within a specific time span from a specific date (Choose time span from dropdown, select date from calendar field
 )
) - Search - Filter to mail from specific folders (inbox, trash, starred, etc.) (Choose folder from dropdown)
- Has attachment - Check the box to limit to mail with attachments
- Don't include chat - Check the box to remove chats from filter
5. Select "Create filter" 
6. A new menu will appear for new emails that fit the search. When a you receive an email that matches the filter, check each box to:
- Skip the Inbox (Archive it) - move the message immediately to Archive, do not show in Inbox
- Mark as read - mark the email as read
- Star it - star the email
- Apply the label: - apply the chosen label to the email (Choose label from dropdown)
- Delete it - delete the email
- Never send it to Spam - do not send the email to spam
- Always mark it as important - mark the email as important
- Never mark it as important - never mark the email as important
- Categorize as: - categorize as chosen category (Choose category from dropdown)
- Also apply filter to ___ matching conversation. - apply filter old conversations with this filter

You must apply at least one option (use the "label" option to automatically put emails into label groups)
7. Select "Create filter" 
_____________________________________________________________________________________________
2.2 Removing or Editing Filters
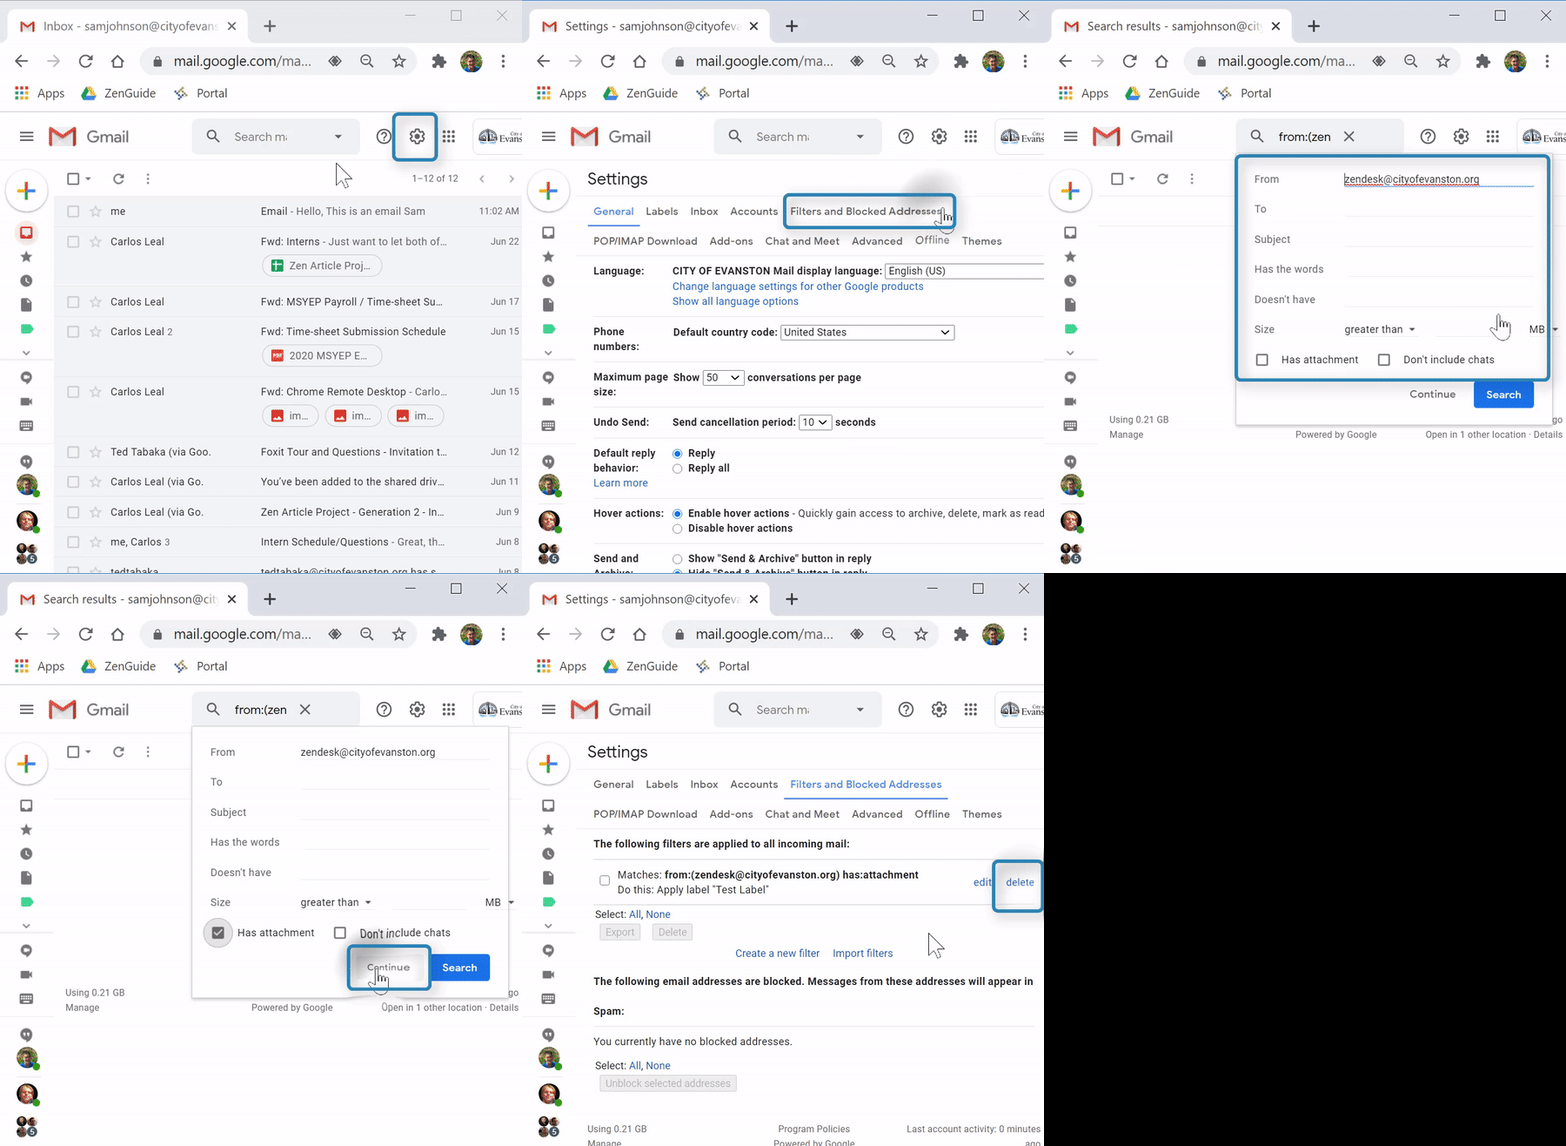
(Video Loading)
Steps
1. Open a web browser
2. Open Gmail
3. Select the "settings" icon from the top right
4. Select "See all settings"
5. Select the "Filters and Blocked Addresses" tab 
To remove filters, select "delete"  to the right of a filter, then select "OK"
To edit filters, select "edit"  then "Continue"
  and "Update filter"
  after making changes