
1. How to Remove a Printer Via Settings
2. How to Remove a Printer Via Control Panel
How to Remove a Printer Via Settings
Steps:
1. Left-Click on the Windows icon on the bottom left of your screen ![]()
2. Select the "Settings" button ![]()
3. Select the "Devices" button 
4. Select "Printers & Scanners" ![]()
5. Left-Click on the printer you would like to remove 
6. Select "Remove Device" 
7. Select "Yes" 
How to Remove a Printer via Control Panel

Steps:
1. Left-Click on the Windows icon on the bottom left of your screen ![]()
2. Type "Control Panel"
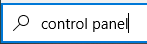
3. Select "Control panel"

4. Select "Hardware and Sound"
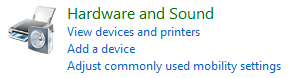
5. Select "Devices and Printers" 
6. Right-Click the printer you want to remove
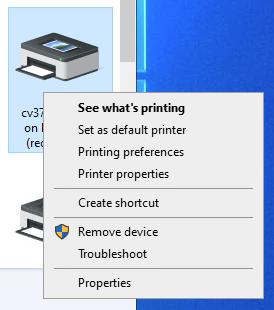
7. Select "Remove Device" 
8. Select "Yes" 