Using Snap Assist
Steps
1. Open the windows to use with snap assist
2. Select the "minimize" icon  at the top right of a window to minimize all windows except one to snap
Snapping 2 Windows
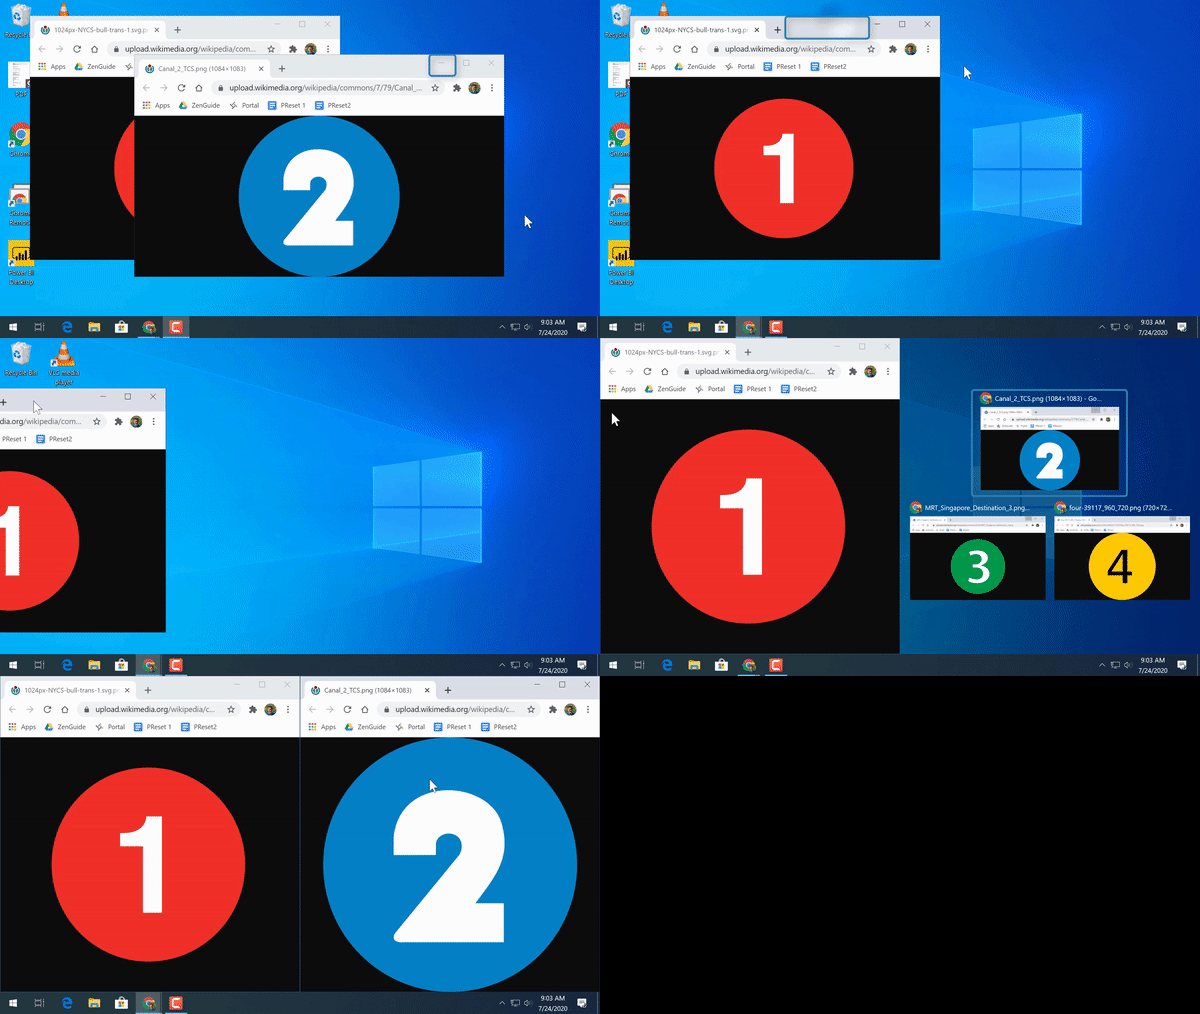
3. Click and hold the window's top/title bar and drag to the right or left of the screen. When the cursor touches the edge of the screen, an outline will appear to indicate the new window borders. Let go of the click to confirm the new window
4. A menu of all other open windows will appear. Select another window to open and automatically snap to open space
Snapping 3 Windows
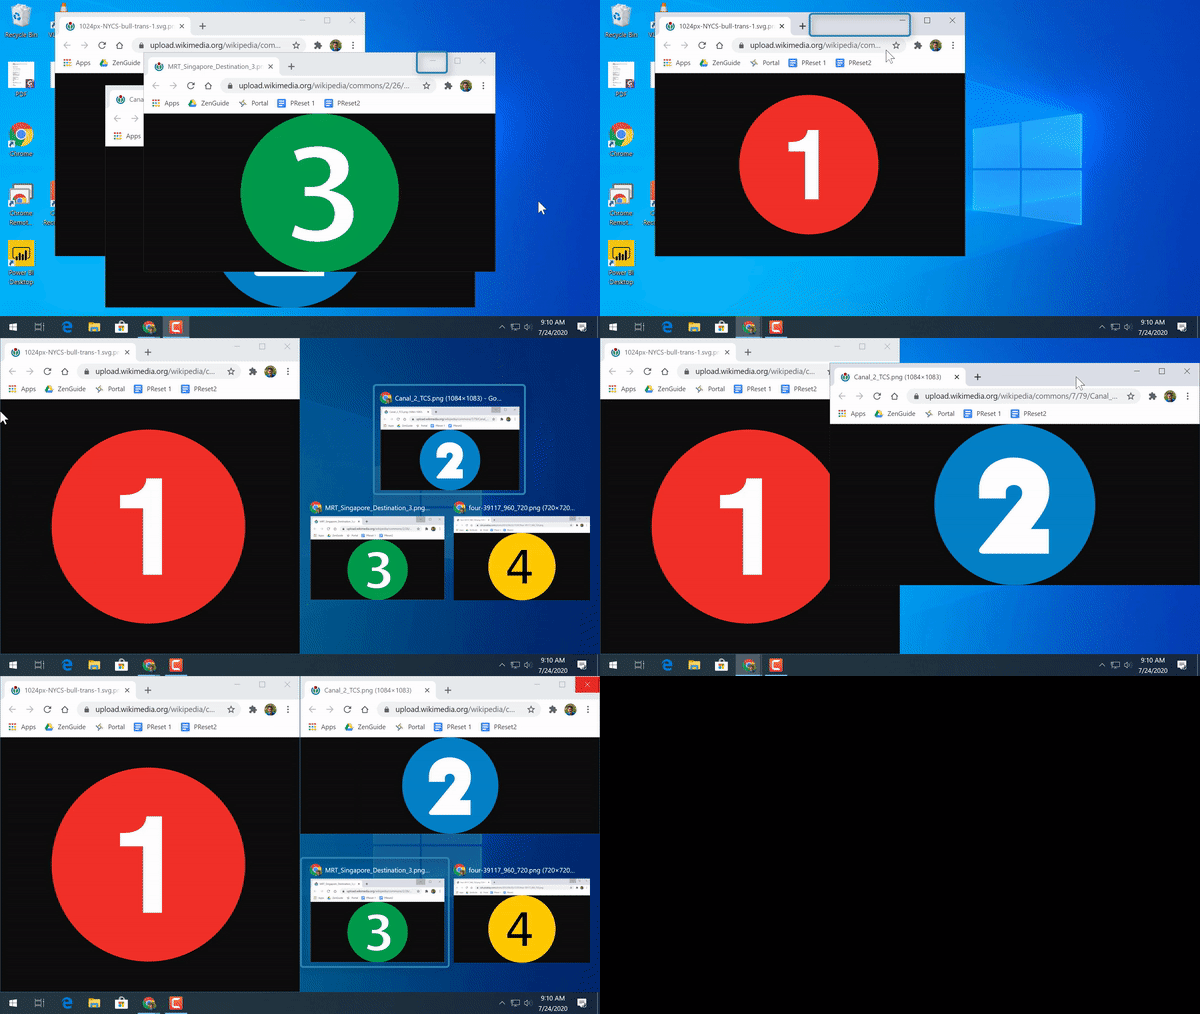
3. Click and hold the window's top/title bar and drag to the right or left of the screen. When the cursor touches the edge of the screen, an outline will appear to indicate the new window borders. Let go of the click to confirm the new window
4. A menu of all other open windows will appear. Select a window to open it. Then, click and hold the title bar of another window, and drag to the open top corner. An outline will appear that will take up half of the empty space. Let go of the click to confirm
5. Select the final window to open
Snapping 4 Windows

3. Click and hold the window's top/title bar and drag to a corner of the screen. When the cursor touches the edge of the screen, an outline will appear to indicate the new window borders. Let go of the click to confirm the new window
4. Open a new window and repeat the step with 2 more windows
5. Select the final window to snap
Note: If a snap option above does not appear to be available, see the Snap Assist Settings guide below.
Snap Assist Settings
Steps
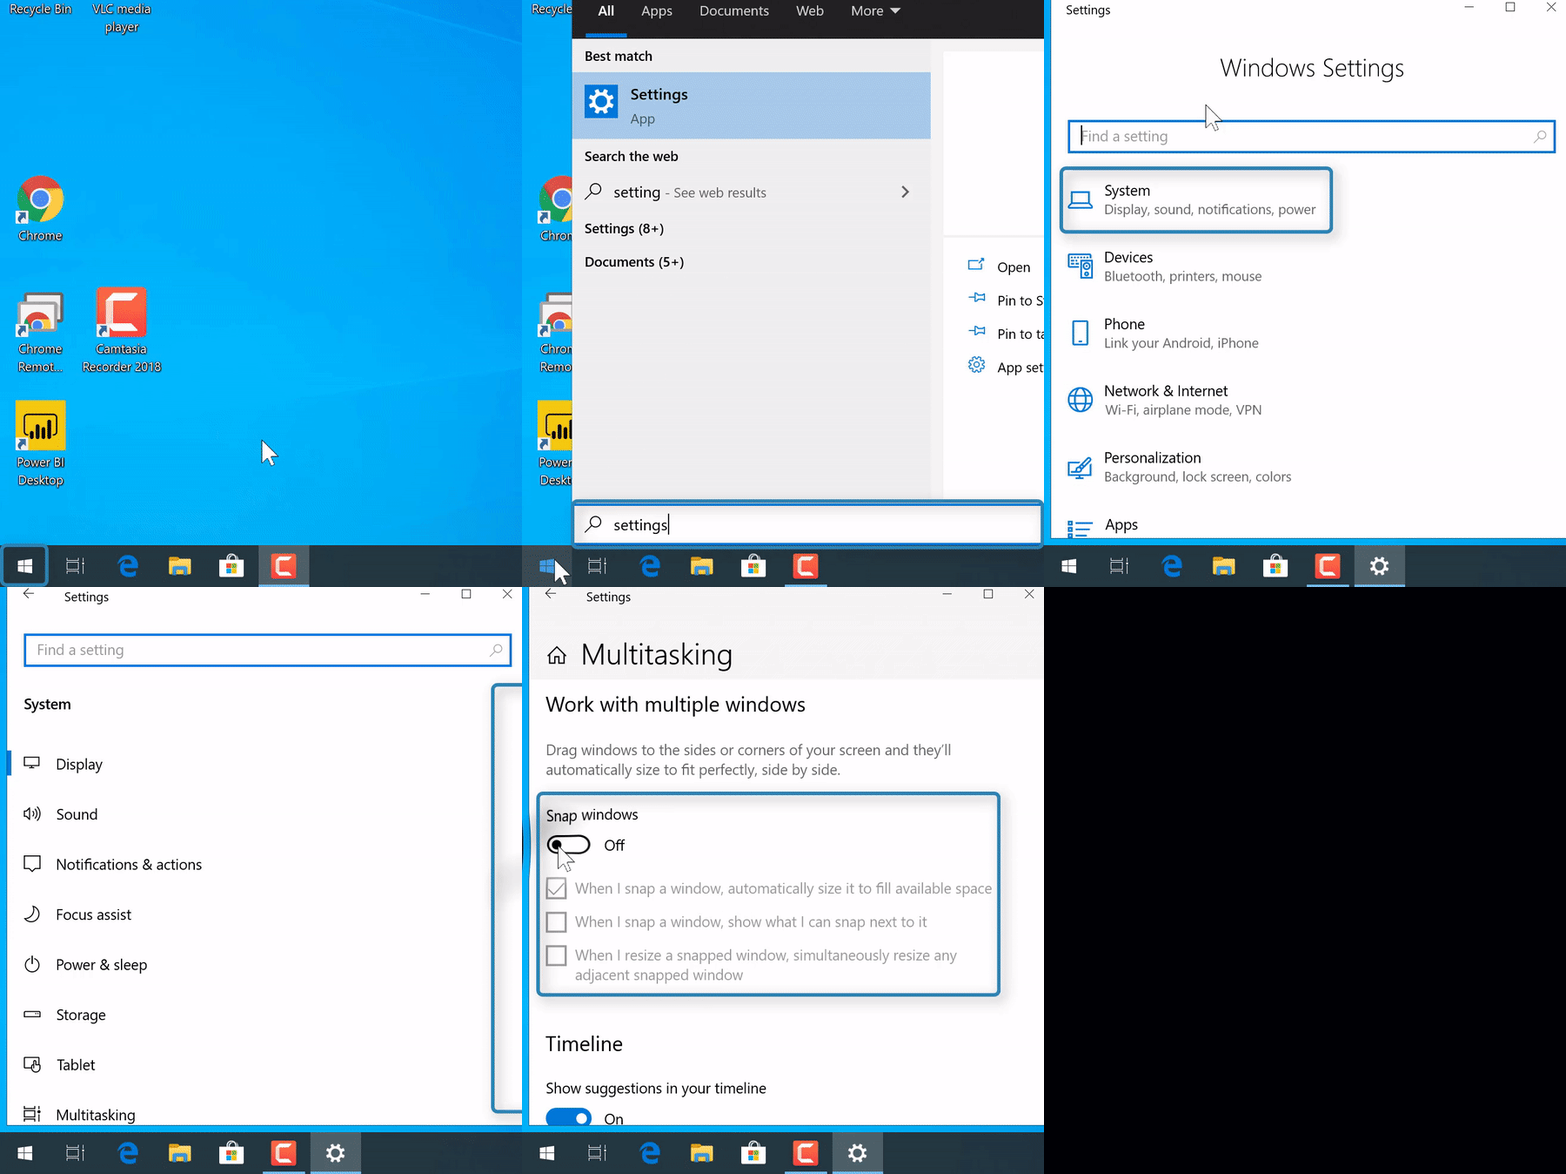
1. In the search bar in the bottom left of the computer, enter "Settings"

NOTE: If there's no search bar, select the "Start menu" icon  at the bottom left corner, then start typing (without a search bar)
2. Select "Settings"

3. Select "System"

4. Scroll down on the left and select "Multitasking" 
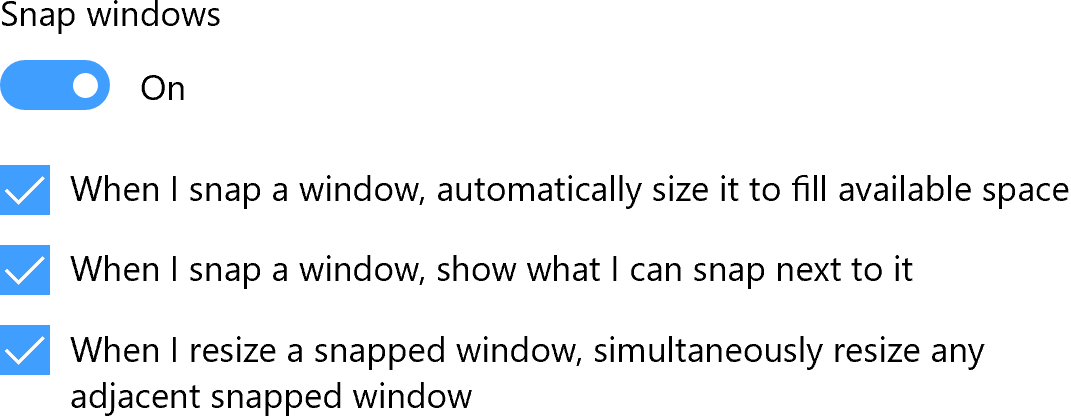
5. Under "Snap windows", make sure every setting is on or checked